Posts

Eclipse Orchid Glass Testing

Image
#0877 Orchid A gold ruby where less is definitely more. This is a rich, dense ruby pink with warm undertones that looks its best when applied thin and not overworked. My favorite beads were those that used the least amount of frit. When piled densely on top of itself an almost brownish color resulted. The thinner areas gave way to a bright ruby pink, where the darker areas turned more burgundy. Working Notes Opacity : This is an opaque glass. A thick application over clear transmits very little light. A thin application over a darker base color stays solid and does not show the base color through. Spread : This glass behaved itself and stayed put. It didn't really spread or sink and held its shape. If you squint your eyes and look for it, you can see a tiny bit of color pooling on the coffee bead, but for the most part it lays down where you place it and looks the same. Futz Factor : I found this glass to be the least fussy of all the colors I tested. The un-encased st...
Eclipse Spring Rose Testing

Image
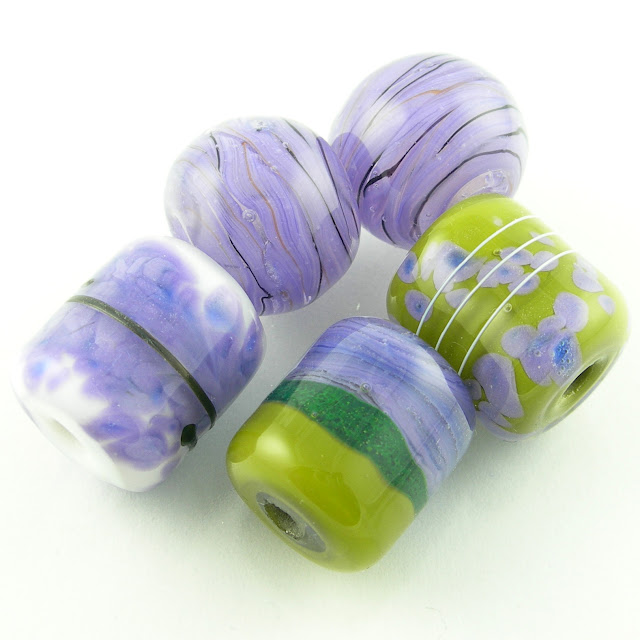
#0477 Spring Rose More like perfect purple if you ask me - a lovely purple with blue undertones. Most opaque purples have warm reddish undertones, so the blue tones in this purple are refreshing and fill a gap in the 96 glass color palette. Working Notes Opacity : This is an opaque glass. A thick application over clear transmits very little light. A thin application over a darker base color sinks in and allows none of the base color to show. Spread : This glass sinks. When super heated it goes nowhere, but rather sinks into the base color and a color pooling starts to appear in the centers. You can see the darker blue spots pooling in the center on the olive bead. Futz Factor : I didn't notice much devitrification with this glass, but then again I always encase my opaque pinks and purples in clear. And since this glass doesn't spread, it didn't seep out of my clear where it was exposed to multiple heating and cooling cycles. The un-encased stringers I pulled ...

Eclipse Light Orchid Pink Testing

Image
#0677 Light Orchid Pink I'd say the name of this color is spot on. A bright pink with purple undertones that is vibrant and not washed out. Working Notes Opacity : This is an opaque glass. A thick application over clear does not transmit much light. Even a thin application over a darker base color holds it owns and doesn't allow much, if any, of the base color through. Spread : This glass spreads. When super heated it spread out over the base color. It also attempted to seep out of the encasement layer if I didn't butt the seems up super tight. Futz Factor : Again, most opaque pink glass will devitrify if exposed to multiple heating and cooling cycles. For this reason I almost always encase it in a layer of clear. However, this glass smooths out quite easily when brought back up to a warm even glow before popping in the kiln. Even the ends that seeped outside of my clear are still shiny. It boils easily if overheated as does most furnace glass when worked in a...

Eclipse Glassworks Color Testing

Image
#0177 Rose Pink Personally, I would rename this color to bubblegum or cotton candy because it is YUMMY! I'll be honest, I started with this glass because it seemed the most unassuming of the sample packets I received. Boy was I surprised when it came out the most scrumptious bubblegum pink after being worked in the flame. Working Notes Opacity : This is an opaque glass. When applied heavily over clear, it does not allow too much light to pass through. However, when applied thin - especially over a dark base color, it is semi-translucent and shows the base color. This could also be attributed to the spreading nature. Spread : As with most pink glass I've worked, I would classify this as a spreader. When heated it spread out over the base color. It also attempted to seep out of the encasement layer if I gave it even the slightest opening. Futz Factor : Opaque pink glass will often devitrify if exposed to repeated heating and cooling. This is handled easily by e...

The Making of a Chandelier: Final Reveal

Image
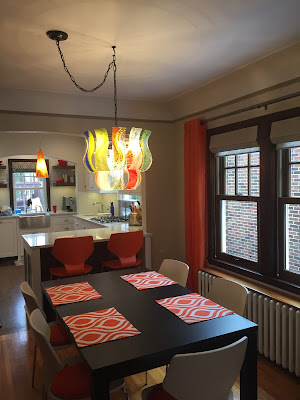
The moment we have all been waiting for ... IT. IS. FINISHED. Cue the applause and rejoicing. Special thanks to my amazing husband for all his help and support with my most ambitious project yet. The final weight with all the glass panels was close to 35 pounds so we made sure to use a heavy-duty chain and hanger that is screwed directly into the ceiling joists. This thing may be heavy, but it is not going anywhere. I am so pleased with the final result that I smile every time I turn it on. It adds an intense pop of color to my otherwise mostly white and grey house. Alternating smooth and textured panels create visual contrast and balance while the gentle swirl in the design and curvature of the glass provide movement. It makes me happy. Now I find myself casually hunting for other discarded vintage light fixtures that I can transform into works of art ... See Also: The Making of a Chandelier: Part 3

The Making of a Chandelier: Part 3

Image
I bet you thought I was never going to finish this project. To be perfectly honest, I often wondered that myself. After firing 20 pieces of glass, it was time to prepare them for hanging. My precision engineer of a studio partner (aka my husband) took the calipers to the chandelier frame and determined that a 3/16" hole would be the right size to allow enough wiggle room to not stress the glass. Off to Amazon to purchase a 3/16" diamond drill bit. My handy hubby rigged up a little system to keep the glass cool/wet and hold it in place to make the drilling process much easier. I picked up a little baking pan from the store and we secured a small piece of scrap wood to the bottom to give the drill bit a cushion. He then attached a couple of handy wood-working clamps to the side to help hold the glass firmly in place. Add some cold water to cover completely and start drilling! True confession: I hold my breath during this process. I don't know why. I always seem to hold...

The Making of a Chandelier: Part 2

Image
I need a bigger kiln. Of course I have been saying that for years already ... but this time I meant it . My chandelier design calls for 3.5" x 12" panels. So I went and bought myself an early birthday present. And then my fabulous husband built me a stand. This is true love right here folks: My new baby! ProFusion 16 In addition to a bigger kiln, I needed to stockpile a lot of glass too. Heaven forbid that gorgeous stand my hubby built have any bare shelves. I filled it. And then some. I knew I wanted color, texture, and movement in this chandelier. After a couple of prototype panels, I finalized the design. Now it was just a matter of building the individual glass panels. All 20 of them. In order to keep the overall structure lightweight, I went with single layer panels. Glass naturally wants to be 6mm thick, so in order to keep it 3mm I chose to break all the rules: I tack-fused and slumped all in one firing. Cue the shock and horror. rule breaker! fuse and ...

Recent Etsy Listings