Coldworking Essentials - What Equipment to Use?
Fused Glass Coldworking Equipment
As a glass artist ... the glass is only half the art. Little did I know when I began my glass journey that my skillset would expand to include the usage of saws, drills, grinders, and flat laps. Nor that I would have such a deep understanding of abrasives and grit numbers. Or that even as a glass artist, diamonds are still truly a girl's best friend.Glass is an amorphous solid and tends to naturally round off to a thickness of 6mm when brought to fluid temperature and allowed to cool to ambient room temperature. Unless you dam off the glass and force it into a different shape and thickness, it will have rounded corners and a slightly convex surface.
I prefer depth and movement in my glass tidied up in a crisp, clean, squared off package. If you are like me, then consider expanding your studio equipment to include these essentials:
Diamond Saw:
You can use a tile saw with a diamond blade if you are just cutting slabs and squaring off edges. If you want to cut out neat little shapes or anything curved, then consider a diamond ring saw instead. Or 'in addition to' if you are a tool collector. Like me.
Diamond Bit Grinder:
This is an invaluable tool for cleaning up edges that are slightly out of shape or have needles/sharp sections. They are heavily used by stained glass artists to refine the shapes of sheet glass cutouts. Also useful for rounding sharp corners and making cut pieces of glass safer to handle [especially if you host student workshops or have child creators].
Disc Grinders/Flat Laps:
I use this tool more than any other. It is the quickest way to shave down those rounded edges and make them nice and squared. Or to clean up any wonky sides that distorted during firing. Or my latest obsession ... skimming off the top layer of glass to make it smooth and extra shiny.
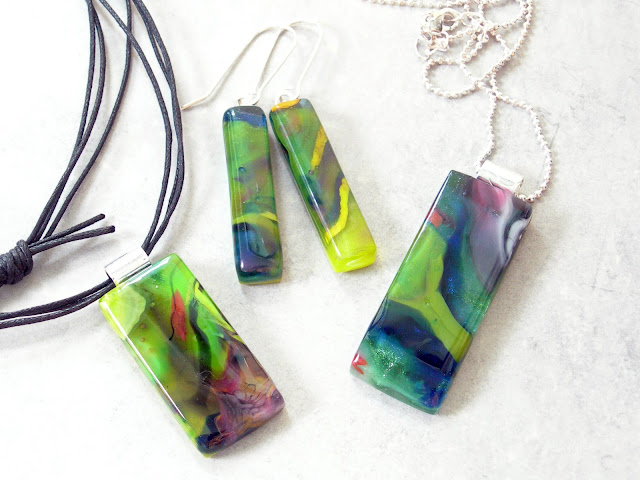
While painstaking and tedious at times, the end result is always worth it. These pieces were all cut on the diamond saw from the same original glass slab. Each of them went through the disc grinder on all edges, and finally a full surface grind to remove the top layers before going back into the kiln for a fire polish to bring them back to glossy.
Why grind the surfaces?
Did you know that multiple firings of the same piece of glass can sometimes cause it to devitrify? Ah yes, devitrification. My nemesis. The best way to ensure the final product does not have dull surfaces with patches of devit is to completely remove the surface layer before the fire polish. This could also be achieved with etching or sandblasting, but I prefer to just give it a swipe across my disc grinder since I'm already using it to square the edges.
Be sure to clean very thoroughly or you risk introducing even more devitrification during your fire polish. Use a finer abrasive for the final grind - around 400 grit seems to work well for me, but as always, test a small piece first.
See Also: Joys of Coldworking & Power Tools: Not Just for Boys


Comments
Post a Comment